









Content
Part 1: The Foundation - Deconstructing Your Menu
The process of designing and equipping a commercial kitchen is a high-stakes investment where initial decisions have long-term financial and operational consequences. The most common and costly mistake is to approach equipment selection as a simple shopping list. A truly efficient, profitable, and functional kitchen is not built from a catalog of appliances; it is engineered from a single source document: the menu. This guide establishes a systematic methodology for translating a culinary vision into a precise, data-driven equipment plan that balances throughput, footprint, utility consumption, and regulatory compliance.
Section 1.1: The Menu as a Technical Blueprint
At its core, a restaurant’s menu is far more than a list of dishes offered to customers. For the operator, chef, and designer, it must be treated as a technical blueprint that dictates every subsequent decision in the kitchen planning process. Each item, from the most complex entrée to the simplest side dish, carries with it a specific set of requirements for storage, preparation, cooking, and holding. A steakhouse requires extensive grill space, while a sushi bar prioritizes refrigerated display cases and specialized rice cookers. This fundamental principle—that the menu dictates the machinery—is the cornerstone of menu-backed kitchen design.
The successful execution of this principle hinges on the early and continuous involvement of the head chef. As experts from the Food Service Consultants Society International (FCSI) consistently emphasize, the chef’s role is crucial for success. A chef’s practical experience provides an invaluable understanding of workflow dynamics, the logical adjacency of stations, and the subtle operational requirements of specific dishes that a designer or procurement manager might overlook. This collaboration ensures that the kitchen is not just a collection of high-quality equipment, but an integrated, ergonomic system designed for the specific culinary program it will execute.
Ultimately, this menu-centric approach directly connects kitchen design to the restaurant’s financial health. A well-engineered kitchen, born from a detailed menu analysis, is designed to support target financial benchmarks. By optimizing workflow and specifying correctly sized equipment, operators can control two of the most significant variable costs: food and labor. The combination of these, known as the “prime cost,” is a critical key performance indicator (KPI) that, according to restaurant industry benchmarks, successful restaurants aim to keep between 55% and 65% of revenue. An efficient kitchen layout reduces unnecessary steps, minimizes staff fatigue, and allows for higher productivity, directly impacting labor costs. Similarly, correctly specified refrigeration and storage systems reduce spoilage, contributing to a healthier food cost percentage. This initial planning phase is therefore a direct investment in achieving target profit margins, which typically range from 6% to 9% for Quick Service Restaurants (QSRs) and 3% to 9% for Full-Service Restaurants (FSRs).
Section 1.2: The Menu Deconstruction Matrix: A Step-by-Step Methodology
To transform the menu from a culinary document into an engineering specification, a systematic deconstruction is required. The primary tool for this process is the Menu Deconstruction Matrix. This analytical worksheet forces a granular examination of every menu item, breaking it down into its constituent operational steps and resource requirements. This methodical approach ensures no equipment need is overlooked and provides the quantitative data necessary for later stages of planning.
The methodology involves a five-step process for each item on the menu:
-
List Every Item: The analysis must be exhaustive, including all appetizers, entrées, side dishes, desserts, and beverages. Every single item that will be prepared and served must be accounted for, as each contributes to the total load on the kitchen’s resources.
-
Identify Ingredients & Storage Requirements: For each menu item, list all raw and prepared components. Next to each component, specify its required storage condition: dry storage (shelving), refrigerated (walk-in or reach-in cooler), or frozen (freezer). This step, as outlined in checklists for commercial kitchen supplies, begins to build the foundation for sizing the kitchen’s total cold and dry storage capacity.
-
Map Preparation Steps and Equipment: Detail every action required to prepare the ingredients before cooking. This includes processes like washing, chopping, slicing, mixing, grinding, and portioning. Each of these steps must be linked to a specific piece of preparation equipment, such as a food processor, planetary mixer, vegetable slicer, or scale.
-
Define the Cooking Process: Specify the exact cooking method (e.g., fry, grill, bake, steam, sauté), the required temperature, and the average cooking time for each component. This information directly identifies the primary cooking equipment needed for the “hot line.” For instance, a dish requiring slow roasting dictates the need for a dedicated or programmable oven, while a stir-fry necessitates a high-BTU wok range.
-
Determine Holding, Plating, and Service Requirements: Analyze what happens after the food is cooked. Does the item need to be held at a safe hot or cold temperature before service? If so, this indicates a need for equipment like heat lamps, steam tables, or refrigerated prep rails. Finally, list all the smallwares—plates, bowls, tongs, ladles, etc.—required for the final assembly and plating of the dish, a step that certified food service consultants highlight as crucial for operational readiness.
This matrix-based approach prevents critical omissions. A simple analysis might conclude that a burger restaurant needs a grill and a fryer. However, the deconstruction matrix forces a deeper look. It might reveal that the “secret sauce” for three different popular burgers requires the same food processor, or that the house-made buns require a specific type of mixer and proofer. This level of detail uncovers not just the major equipment lines, but also the supporting and preparation equipment that is critical to the actual, real-world execution of the menu.
The following table provides a fillable template for this process. It is the foundational worksheet for this guide, transforming a menu into a quantifiable set of operational and equipment requirements.
Table 1: The Menu Deconstruction Matrix (Fillable Template)
| Menu Item | Peak Volume (Projected Portions/Hr) | Key Ingredients | Storage Type (Dry/Cold/Frozen) | Prep Steps & Equipment | Cooking Method/Time/Temp | Primary Cooking Equipment | Holding Method & Equipment | Plating Smallwares |
|---|---|---|---|---|---|---|---|---|
| Example: Signature Burger | 30 | Ground beef, buns, lettuce, tomato, special sauce | Cold, Dry, Cold | Portion patties (scale), slice tomato (knife), mix sauce (food processor) | Grill patty (5 min @ 450°F), toast bun (1 min) | Charbroiler, Griddle | Hold patties (steam table), hold sauce (cold rail) | Plate, tongs, squeeze bottle |
Section 1.3: Calculating Peak Production & Throughput Requirements
Once the Menu Deconstruction Matrix has been completed, the next critical step is to translate this qualitative data into the quantitative metrics needed for equipment sizing. The goal is to determine the peak production demand for each piece of equipment in the kitchen. Sizing equipment for average demand will lead to service bottlenecks and dissatisfied customers; sizing for peak demand ensures the kitchen can perform under maximum pressure.
This calculation is a three-step process:
-
Forecast Peak Demand (Covers per Hour): Using the restaurant’s business plan and market analysis, project the total number of customers, or “covers,” that will be served during the single busiest hour of the week (e.g., Friday from 7:30 PM to 8:30 PM). This forecast can be refined by using industry benchmarks for table turnover rates. For example, a full-service restaurant typically turns tables every 1 hour and 15 minutes, while a QSR may do so every 30 minutes. For a 100-seat FSR, a reasonable peak might be calculated as:
100 seats / 1.25 hours per turn = 80 covers per hour. -
Apply Menu Mix Percentage: Not all customers will order the same item. Using industry data or educated projections, assign a “menu mix” percentage to each item, representing its anticipated popularity. This percentage is then applied to the peak cover count to determine the number of each specific dish that must be produced per hour. For example, if the “Signature Burger” is projected to account for 25% of entrée sales, the peak production requirement would be:
80 covers/hour * 25% = 20 burgers per hour. This calculation must be done for every item on the menu. -
Convert Dish Volume to Component Throughput: This is the final and most crucial step. The required number of dishes per hour is broken down into the production load on individual pieces of equipment. This provides the specific throughput metric needed for equipment selection. Continuing the burger example:
-
Grill Throughput: 20 burgers per hour requires the grill to cook 20 patties per hour.
-
Fryer Throughput: If each burger is served with a 6 oz portion of french fries, the fryer must produce
20 portions * 6 oz/portion = 120 oz(or 7.5 lbs) of fries per hour. This “lbs per hour” figure is a standard industry metric for sizing commercial fryers. -
Food Processor Throughput: If the special sauce recipe yields 1 gallon per batch and each burger uses 1 oz of sauce, the kitchen needs 20 oz of sauce per hour. If a batch takes 10 minutes to make in the food processor, this single piece of equipment can easily meet demand. However, if three other menu items also require the processor during the same prep window, a potential bottleneck is identified.
This systematic conversion from abstract menu concepts to concrete production numbers like “lbs per hour” or “patties per hour” removes guesswork from the equipment specification process. It provides the hard data needed to select a machine that is neither underpowered (creating bottlenecks) nor overpowered (a waste of capital, space, and energy).
Part 2: Designing the Engine - Workflow, Stations, and Layouts
With the operational requirements quantified through menu deconstruction, the next phase is to translate this data into a physical kitchen design. This involves arranging the core operational zones and individual work stations into a cohesive layout that promotes an efficient, safe, and logical flow of goods, personnel, and product. The goal is to create an ergonomic engine for the restaurant, where every element is placed to minimize movement, prevent cross-contamination, and maximize productivity.
Section 2.1: Principles of Ergonomic Kitchen Flow & The Five Core Zones
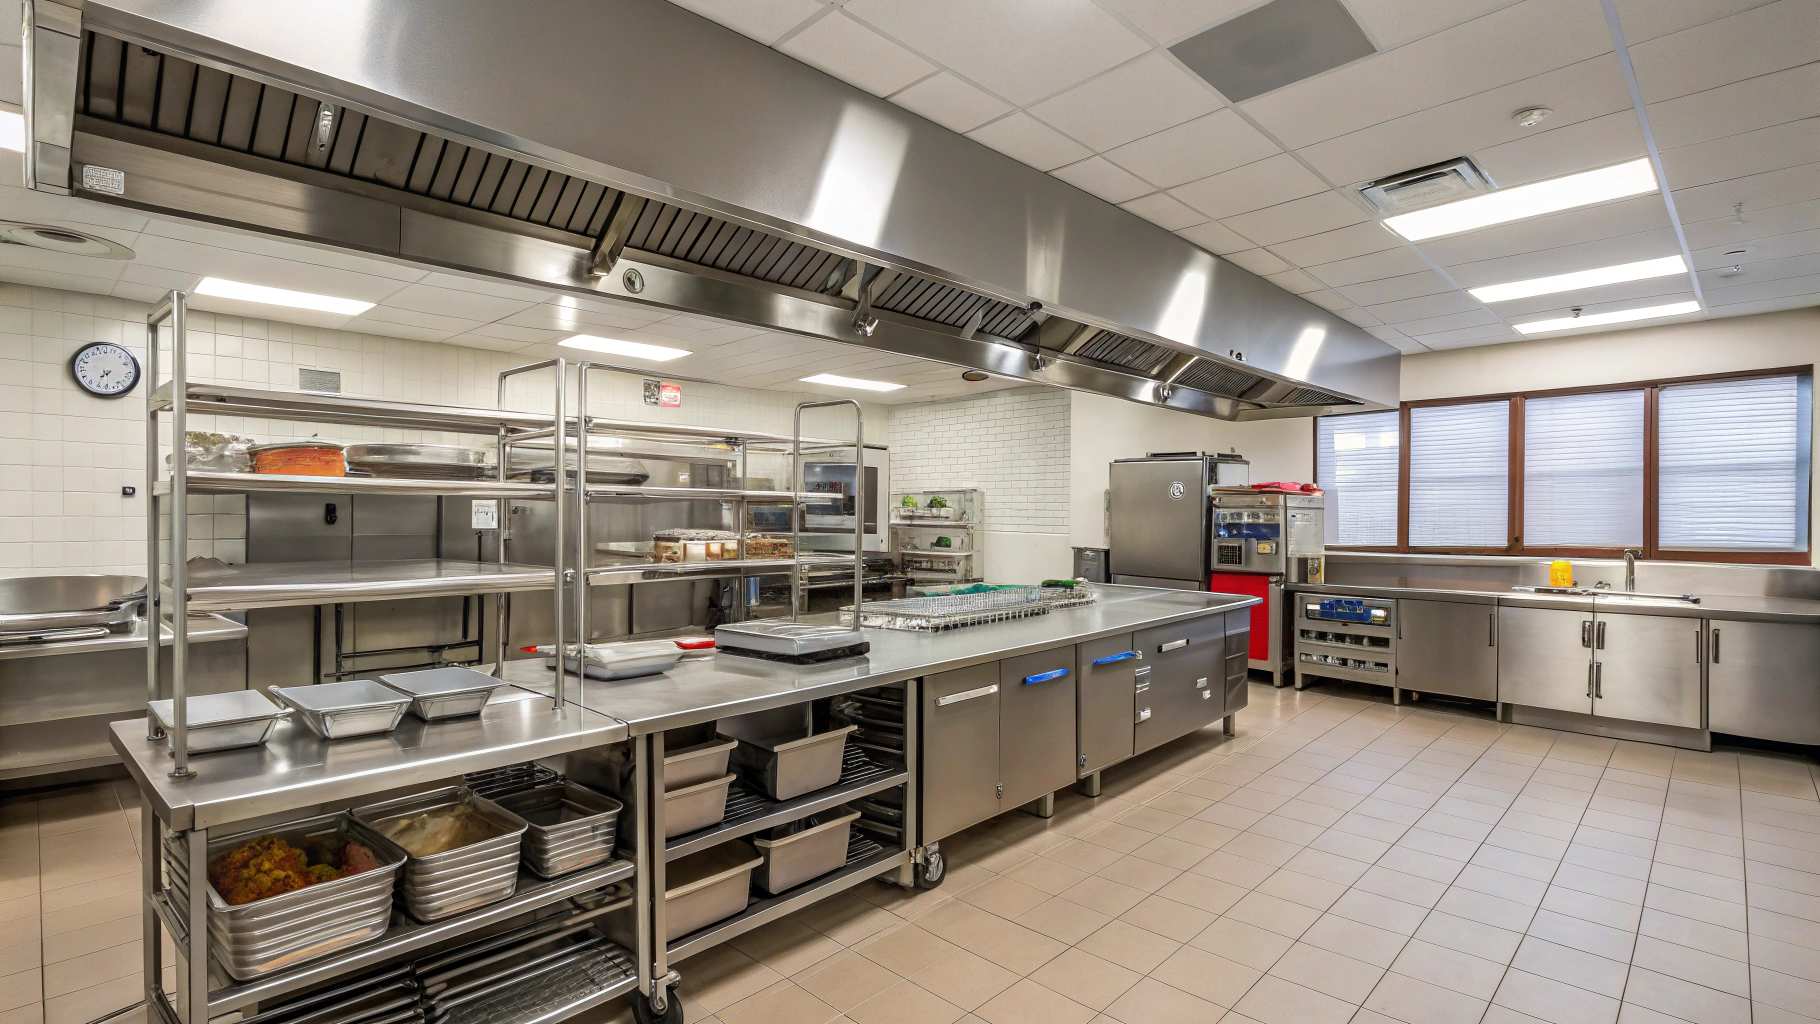
The foundational principle of efficient kitchen design is to establish a logical workflow that follows the natural progression of food from its raw state to a finished plate. This linear flow is critical for preventing dangerous cross-contamination between raw and cooked foods and for eliminating traffic jams and wasted movement by staff. A well-designed kitchen is organized into distinct zones, each dedicated to a specific stage of the food production process. These zones should be arranged to facilitate a seamless handoff from one stage to the next.
The five core zones of a commercial kitchen are:
-
Receiving Zone: This is the entry point for all goods into the restaurant. It should be located at a loading dock or back entrance and provide adequate space for staff to inspect deliveries for quality and accuracy before they are moved into storage. This area requires clear floor space and may include scales for weighing incoming products.
-
Storage Zone: Logically situated adjacent to the receiving area, this zone is subdivided into three distinct categories based on temperature requirements.
-
Dry Storage: For non-perishable goods like flour, sugar, and canned products. This area consists of shelving units and ingredient bins, and must be kept clean, dry, and well-ventilated, as noted in guides on essential kitchen supplies.
-
Cold Storage: For perishable items like fresh produce, dairy, and meat. This includes walk-in coolers for bulk storage and smaller reach-in or under-counter refrigerators for station-specific use.
-
Frozen Storage: For all frozen products, utilizing walk-in or reach-in freezers.
-
Preparation Zone: This is where raw ingredients are processed before cooking. To maintain food safety, it is often divided into separate areas for raw proteins and produce. The prep zone is equipped with stainless steel work tables, sinks for washing, and the necessary preparation equipment identified in the Menu Deconstruction Matrix, such as mixers, slicers, and food processors. Placing this zone near the storage areas minimizes the time and effort required to retrieve ingredients.
-
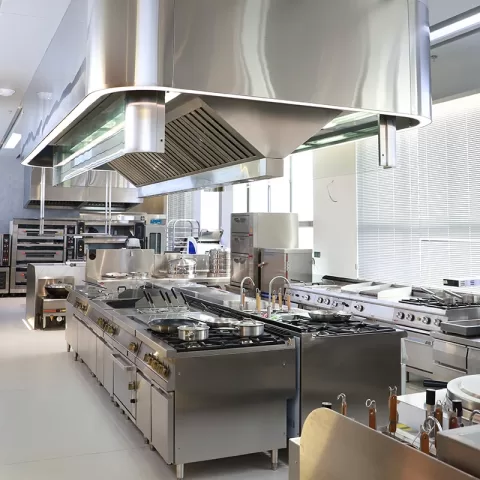
Cooking Zone (The “Hot Line”): This is the heart of the kitchen and the area most directly shaped by the menu. It contains the primary cooking equipment, such as ranges, ovens, fryers, and grills. The arrangement of this line is critical for speed and efficiency during service.
-
Service & Warewashing Zone: This zone handles the final stages of the process.
-
Service Area: This is the point of transfer between the back-of-house and front-of-house. It includes the “pass” or “expo” area where finished dishes are plated and garnished before being picked up by servers. This area often includes heat lamps or hot holding cabinets to keep food at a safe serving temperature.
-
Warewashing Area: Commonly known as the “dish pit,” this area is for cleaning all dishes, cookware, and utensils. A proper layout includes a drop-off point, a three-compartment sink, a commercial dishwasher, and clean drying racks. As emphasized in commercial kitchen planning guides, the flow must be designed to prevent any crossover between dirty and clean items.
Section 2.2: Common Commercial Kitchen Layouts
The arrangement of the five core zones is defined by the overall kitchen layout. The choice of layout is a strategic decision that depends on the kitchen’s size, the menu’s complexity, and the desired service style. Each archetype has distinct advantages and disadvantages.
-
Assembly Line Layout: This layout arranges equipment in a linear sequence that follows the steps of production. It is highly efficient for restaurants with limited menus and high-volume production, such as QSRs or pizzerias. The workflow is intuitive, minimizing staff movement.
-
Island Layout: This design features a central block for primary cooking equipment, with other zones along the perimeter walls. It is well-suited for large, square-shaped kitchens and promotes communication and supervision.
-
Zone Layout: In this configuration, the kitchen is divided into separate stations based on function (e.g., sauté station, grill station). This layout is ideal for large restaurants with complex menus, such as those in hotels or fine dining establishments, where specialized chefs work within their designated areas.
-
Galley Layout: This is a space-efficient layout where all equipment and stations are arranged in parallel lines along two opposing walls. It is common in kitchens with limited space but can be prone to congestion if not planned carefully.
-
Open Kitchen Layout: This modern layout intentionally merges the kitchen with the dining area, turning the act of cooking into a form of entertainment. This design is popular in modern bistros and in concepts like sushi restaurants, where crafting a unique dining experience is part of the appeal. While it can make a space feel larger, it requires impeccable cleanliness and careful management of noise and ventilation.
The selection of a macro layout is a foundational commitment to a specific operational philosophy. A pizzeria’s menu, for instance, is inherently sequential and perfectly suited to an Assembly Line layout. Choosing a Zone layout for this concept would be a critical error, forcing inefficient movement that would permanently inflate labor costs and impact the restaurant’s prime cost and overall profitability. This decision is not merely spatial but a long-term financial one that must align with the menu’s operational DNA.
Section 2.3: Sample Station Blueprints & Adjacencies
Within the larger kitchen layout, the design of individual work stations is critical for maximizing efficiency. These “micro-layouts” should be designed based on ergonomic principles to minimize steps and wasted motion. One of the most enduring of these principles is the “Work Triangle,” which suggests that the three most critical components of a station—storage, preparation, and cooking—should be arranged in a close, triangular pattern.
Below are blueprints for three common stations, illustrating logical equipment placement:
-
Fry Station Blueprint: An efficient fry station is designed for a simple, linear workflow: Raw Product Storage → Breading/Staging Area → Fryers → Landing Zone → Holding. This station should be located near the main cooking line’s service point for quick plating.
-
Sauté/Range Station Blueprint: This is often the busiest station and must be designed for speed. Key elements include the primary cooking equipment (range/ovens), refrigerated drawers below for mise en place, an overhead pot rack for instant access to cookware, and an adjacent plating area.
-
Warewashing Station Blueprint: The layout of the dish pit is crucial for sanitation. The flow must be unidirectional: Dirty Drop-Off → Pre-Rinse Station (equipped with a high-pressure pre-rinse sprayer) → Dishwasher → Clean Landing and Drying → Storage. This prevents bottlenecks and keeps dirty and clean items separate.
By carefully designing these individual stations and arranging them within the appropriate macro-layout, a kitchen becomes a highly efficient production environment where each staff member has the tools they need within arm’s reach, minimizing movement and maximizing output.
Part 3: Selecting the Tools - Equipment Specification and Sizing
This section forms the technical core of the planning process. Here, the throughput requirements calculated in Part 1 are used to select specific types and sizes of equipment. This is an exercise in matching the kitchen’s “engine” to the performance demands of the menu. The goal is to specify equipment that can comfortably handle peak service volume without being excessively oversized, which is an inefficient use of capital, space, and utilities. A critical consideration throughout this process is the Total Cost of Ownership (TCO), which extends beyond the initial purchase price to include installation, utility consumption, maintenance, and ventilation costs. For a deeper dive into managing these expenses, explore our restaurant cost-cutting guide on sourcing quality furniture at factory prices.
Section 3.1: The Major Equipment Lines: Sizing for Peak Performance
The following subsections provide data-driven guidance for sizing the most critical categories of commercial kitchen equipment, using standard industry metrics.
-
Ovens (Convection, Combination, Deck): Oven capacity is measured by the number of standard sheet pans they can accommodate.
-
Full-Size Convection Oven: A standard, single-deck model typically holds five full-size (18" x 26") sheet pans. These are workhorses for bakeries and high-volume roasting.
-
Half-Size Convection Oven: These smaller units hold half-size (13" x 18") pans and are suitable for lower-volume applications.
-
Combination (Combi) Ovens: These versatile units are also sized by pan capacity. A full-size combi oven might hold between five and twelve 12" x 20" steam table pans, according to specifications from programs like Energy Star.
-
Sizing Decision: The menu dictates the choice. A bakery needs the high pan capacity of a double-stack convection oven, while a steakhouse may only need a single half-size oven for side dishes.
-
Fryers (Gas, Electric, Ventless): Fryer throughput is measured in the pounds (lbs) of frozen french fries the unit can cook in one hour (lbs/hr).
-
Countertop Models: Typically have a throughput ranging from 30 to 60 lbs/hr.
-
Floor Models: A typical 35-40 lb oil capacity gas fryer can produce approximately 50 lbs of fries per hour.
-
High-Performance Models: For high-volume applications, there are units capable of producing up to 90 lbs/hr or more.
-
Sizing Decision: The required lbs/hr calculated in Section 1.3 maps directly to a specific class of fryer. An operation projecting a peak need of 45 lbs/hr should select a model rated for at least 50 lbs/hr to ensure a performance buffer.
-
Ranges, Grills, and Griddles: These appliances are sized by their linear width (e.g., 36", 48", 60") and the number of burners or total cooking surface area. The sizing is determined by the maximum number of items that need to be cooked simultaneously during the peak service hour.
-
Walk-In and Reach-In Refrigerators/Freezers: Capacity is measured in cubic feet. Sizing is a function of menu complexity, business volume, and the frequency of supplier deliveries.
-
Refrigerated Prep Tables (Sandwich/Pizza): Sized by their width (e.g., 48", 60", 72") and the number of food pans that can be held in the refrigerated top rail.
-
Hot Holding Cabinets: Sized by their pan capacity. These are essential for holding batch-cooked items at a food-safe temperature of 135°F (57°C) or above, a critical requirement outlined in the FDA Food Code.
-
Commercial Dishwashers: Throughput is measured in racks per hour. The choice of machine type depends directly on the projected volume of dishes.
-
Undercounter Dishwashers: Suitable for small cafes or bars, these units can typically process 20 to 45 racks per hour.
-
Door-Type (Pass-Through) Dishwashers: The standard for most mid-sized restaurants, these can handle from 40 up to 175 racks per hour.
-
Conveyor Dishwashers: For high-volume operations like cafeterias or large restaurants, these machines can process from 200 to over 700 racks per hour.
-
Sizing Guideline: A useful industry benchmark is that approximately 35 racks of dirty dishes are generated for every 100 meals served. An operator can use their peak cover forecast to calculate the required racks per hour.
-
Planetary Mixers: The primary sizing metric for mixers is the bowl capacity, measured in quarts (qt).
-
Countertop Mixers (5-20 qt): Suitable for light-duty tasks.
-
Floor Mixers (30-80 qt and larger): Essential for bakeries, pizzerias, and any operation that needs to mix large, heavy batches of dough.
The following table consolidates key throughput and sizing benchmarks to aid in the specification process.
Table 2: Equipment Throughput & Sizing Benchmarks
| Equipment Category | Sub-Type | Key Sizing Metric | Low Volume Range | Mid Volume Range | High Volume Range |
|---|---|---|---|---|---|
| Deep Fryers | Countertop/Floor | lbs of Fries per Hour | 30-50 lbs/hr | 50-80 lbs/hr | 90+ lbs/hr |
| Convection Ovens | Full-Size, Single Deck | # of Full-Size Pans (18"x26") | N/A (Half-size oven) | 5 pans | 10 pans (Double Stack) |
| Combi Ovens | Full-Size | # of Steam Pans (12"x20") | 3-5 pans | 6-10 pans | 11-20 pans |
| Dishwashers | Undercounter | Racks per Hour | 20-45 racks/hr | N/A | N/A |
| Dishwashers | Door-Type | Racks per Hour | N/A | 40-80 racks/hr | 80-175 racks/hr |
| Dishwashers | Conveyor | Racks per Hour | N/A | N/A | 200-700+ racks/hr |
| Planetary Mixers | Countertop/Floor | Bowl Capacity (Quarts) | 5-20 qt | 30-40 qt | 60-80+ qt |
Section 3.2: The Strategic Advantage of Modern Technology
Specifying equipment is not just about matching capacity to demand; it is also about leveraging technology to solve operational challenges, enhance flexibility, and reduce long-term costs.
-
Ventless Equipment: Traditionally, cooking equipment that produces grease-laden vapor requires a Type I ventilation hood. The installation of this system is a major construction project and a significant cost center. As equipment experts from Middleby advise, ventless cooking equipment incorporates sophisticated, self-contained air filtration systems that eliminate the need for external ventilation. This technology is a strategic game-changer for operators in locations where traditional venting is physically impossible or prohibitively expensive, such as historic buildings or shopping malls. While the initial purchase price may be higher, the total installed cost is often dramatically lower.
-
Combination (Combi) Ovens: Combi-ovens are one of the most versatile pieces of equipment in a modern kitchen. By integrating three cooking functions—convection, steam, and a combination of both—into a single unit, they can perform a wide range of tasks. This multi-functionality saves valuable kitchen space and provides immense menu flexibility. Furthermore, modern combi-ovens feature programmable controls that can store complex recipes. This automation helps to de-skill certain cooking processes, enabling less experienced staff to produce consistent, high-quality results—a critical advantage highlighted by the Foodservice Consultants Society International in today’s challenging labor market.
Section 3.3: Smallwares, Storage, and Support Equipment Checklist
While major appliances form the backbone of the kitchen, the operation cannot function without a comprehensive inventory of smallwares, storage solutions, and safety equipment. The following checklist, categorized for clarity, outlines these essential supporting items.
-
Cookware: Stock pots, saucepans, sauté pans, cast iron skillets, baking sheets, baking pans, roasting pans.
-
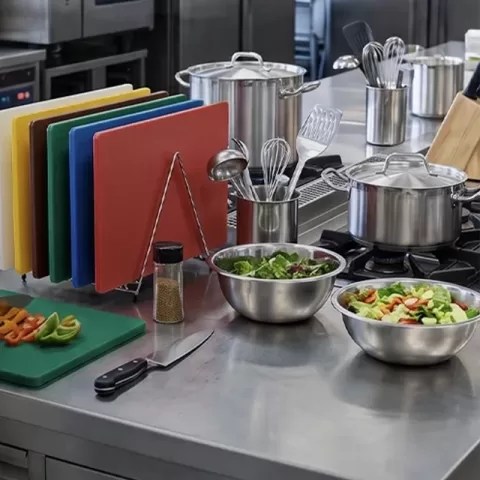
Preparation Tools: Chef’s knives, paring knives, bread knives, cutting boards (color-coded for food safety), mixing bowls, measuring cups and spoons, digital scales, portion servers, food thermometers, whisks, spatulas, tongs, ladles, strainers.
-
Storage and Transport: Wall-mounted shelving units, dunnage racks, ingredient bins, plastic food storage containers, bun pan racks, utility carts.
-
Safety and Sanitation: Fire extinguishers (Class K for kitchens), first aid kits, non-slip rubber floor mats, dedicated hand washing sinks with soap and paper towel dispensers, sanitizing buckets, cleaning cloths, mops, brooms, wet floor signs, emergency eye wash station.
Part 4: Ensuring Compliance and Future-Proofing
Specifying and designing a commercial kitchen extends beyond operational efficiency; it requires strict adherence to a complex web of health, safety, and sanitation regulations. These regulations vary significantly between jurisdictions, with the United States and the European Union having distinct frameworks. Navigating these standards is critical for ensuring legal operation, passing health inspections, and protecting both customers and staff.
Section 4.1: Navigating Global Regulatory Standards: US vs. EU
Operators planning to open restaurants in either the US or the EU, or those sourcing equipment internationally, must understand the key differences in their certification systems. “Certified” is not a universal term; compliance in one market does not guarantee compliance in the other. This is a critical consideration, similar to the challenges detailed in our guide on avoiding common mistakes when buying restaurant furniture from China.
United States (US)
The regulatory environment in the United States is primarily focused on sanitation and the prevention of foodborne illness.
-
Sanitation Design and Materials (NSF International): In the U.S., product certification to NSF/ANSI standards is so prevalent that it is virtually impossible to operate a commercial kitchen without it. Health inspectors look for the NSF mark as proof that equipment meets standards for public health and sanitation. These standards ensure that equipment is made from non-toxic, corrosion-resistant materials and is designed to be smooth, durable, and easily cleanable. Key NSF food equipment standards include:
-
NSF/ANSI 2: General Food Equipment (e.g., tables, sinks, shelves).
-
NSF/ANSI 4: Commercial Cooking, Rethermalization, and Hot Food Holding Equipment.
-
NSF/ANSI 7: Commercial Refrigerators and Freezers.
-
NSF/ANSI 51: Food Equipment Materials, which sets requirements for the safety of materials that come into contact with food.
-
Operational Food Safety (FDA Food Code): The U.S. Food and Drug Administration (FDA) publishes the Food Code, a model regulation adopted by state and local health departments. A central concept is the control of Time/Temperature Control for Safety (TCS) foods.
-
Temperature Danger Zone: This is the range between 41°F and 135°F (5°C and 57°C), where pathogens can grow rapidly.
-
Cold Holding: TCS foods must be held at or below 41°F (5°C).
-
Hot Holding: TCS foods must be held at or above 135°F (57°C).
-
Cooling Process: Cooked TCS foods must be cooled using a mandatory two-step process: from 135°F down to 70°F within two hours, and then from 70°F down to 41°F or below within an additional four hours, as detailed in FDA guidance for food employees.
European Union (EU)
The European Union’s regulatory framework is primarily focused on ensuring the mechanical and electrical safety of equipment and the chemical safety of food contact materials.
-
Equipment Safety (CE Marking): The CE mark is a mandatory conformity marking for products sold within the European Economic Area (EEA). By affixing the mark, the manufacturer declares that the product meets all applicable EU safety, health, and environmental protection requirements. For commercial kitchen equipment, several key EU directives apply, including the Machinery Directive, Low Voltage Directive (LVD), and Electromagnetic Compatibility (EMC) Directive.
-
Food Contact Materials (FCM): The EU has a comprehensive legal framework governing materials that come into contact with food. The cornerstone is Regulation (EC) No 1935/2004, which establishes that materials must not endanger human health or alter the food’s composition. Manufacturers must provide a Declaration of Compliance (DoC) to demonstrate that their products meet these requirements.
-
UKCA Marking: Following the UK’s departure from the EU, the UKCA (UK Conformity Assessed) mark has been introduced for goods being placed on the market in Great Britain. It covers most goods that previously required the CE marking.
The different philosophies of these two systems create a significant compliance trap. An American manager might see a CE mark and assume it is “certified,” but it offers no guarantee that the equipment meets the NSF sanitation standards a US health inspector requires. Conversely, an NSF-certified piece of equipment is illegal to place on the EU market without a CE mark.
The following table provides a high-level comparison of these regulatory systems.
Table 3: US vs. EU Regulatory Snapshot
| Requirement Area | United States (US) | European Union (EU) | Key Takeaway for Operator |
|---|---|---|---|
| Equipment Safety | Primarily handled by Nationally Recognized Testing Laboratories (NRTLs) like UL and ETL. | CE Marking is mandatory. It is a manufacturer’s self-declaration of conformity. | Equipment must have the correct safety marks for the market of installation. They are not interchangeable. |
| Sanitation Design | NSF/ANSI Certification is the de facto standard, required by most health departments. | General hygiene requirements exist, but there is no single, universally required sanitation mark equivalent to NSF. | For US operations, NSF certification is non-negotiable. |
| Food Contact Materials | Materials must comply with FDA regulations and are covered under NSF/ANSI 51. | Governed by framework Regulation (EC) No 1935/2004. Requires a Declaration of Compliance (DoC). | Ensure suppliers can provide documentation of FCM compliance for the specific market. |
| Operational Food Safety | Governed by the FDA Food Code, which sets standards for temperature control and hygiene. | General food hygiene regulations apply across the EU, with specific requirements often set at the national level. | Adherence to local health code is paramount. The FDA Food Code’s temperature rules are a robust baseline. |
Section 4.2: Utilities, Ventilation, and Infrastructure Planning
The equipment list generated from the menu analysis is a critical input for the project’s architects and engineers. Each piece of equipment has specific utility requirements that must be planned for in the building’s infrastructure.
-
Utilities: Early in the design phase, a comprehensive utility load schedule must be created. This involves summing the requirements for all specified equipment:
-
Electrical: Total amperage, voltage, and phase.
-
Gas: Total British Thermal Units (BTU) per hour.
-
Water: Gallons Per Minute (GPM) or Gallons Per Hour (GPH).
This consolidated data allows engineers to correctly size the building’s main services to avoid costly upgrades later. -
Ventilation: The cooking equipment list directly determines the kitchen’s ventilation needs.
-
Type I Hoods: Required over equipment that produces grease-laden vapors (e.g., ranges, fryers, grills).
-
Type II Hoods: Used for equipment that produces only heat and steam (e.g., most ovens, steamers).
The size, type, and airflow (CFM) of the required hoods are dictated by the equipment underneath them. Re-emphasizing the strategic value of ventless technology is important here; its adoption can dramatically simplify or even eliminate the need for complex Type I hood systems, representing a significant potential cost saving.
Section 4.3: Stated Assumptions and Regional Variances
This guide is based on a set of baseline assumptions, and operators must be aware of key regional variances that will impact equipment selection and installation.
-
Assumptions: The project site has access to standard commercial utilities. The user is responsible for ensuring compliance with all local and municipal building codes, fire codes, and zoning regulations.
-
Key Regional Variances:
-
Electrical Systems: The US generally operates on a 60Hz grid (120/208V or 120/240V), while most of the EU and the UK operate on a 50Hz grid (230/400V). Equipment is rarely cross-compatible.
-
Gas Connections: Natural gas types, pressures, and connection fittings vary between countries.
-
Measurement Units: The US predominantly uses the Imperial system (inches, Fahrenheit), while the EU uses the Metric system (meters, Celsius).
Part 5: Final Deliverables and Tools
This final part of the guide provides the actionable templates and checklists necessary to apply the principles and methodologies discussed. These tools are designed to translate the planning process into a concrete, organized set of documents for budgeting, procurement, and project management.
Section 5.1: The Fillable Bill of Materials (BOM) Template
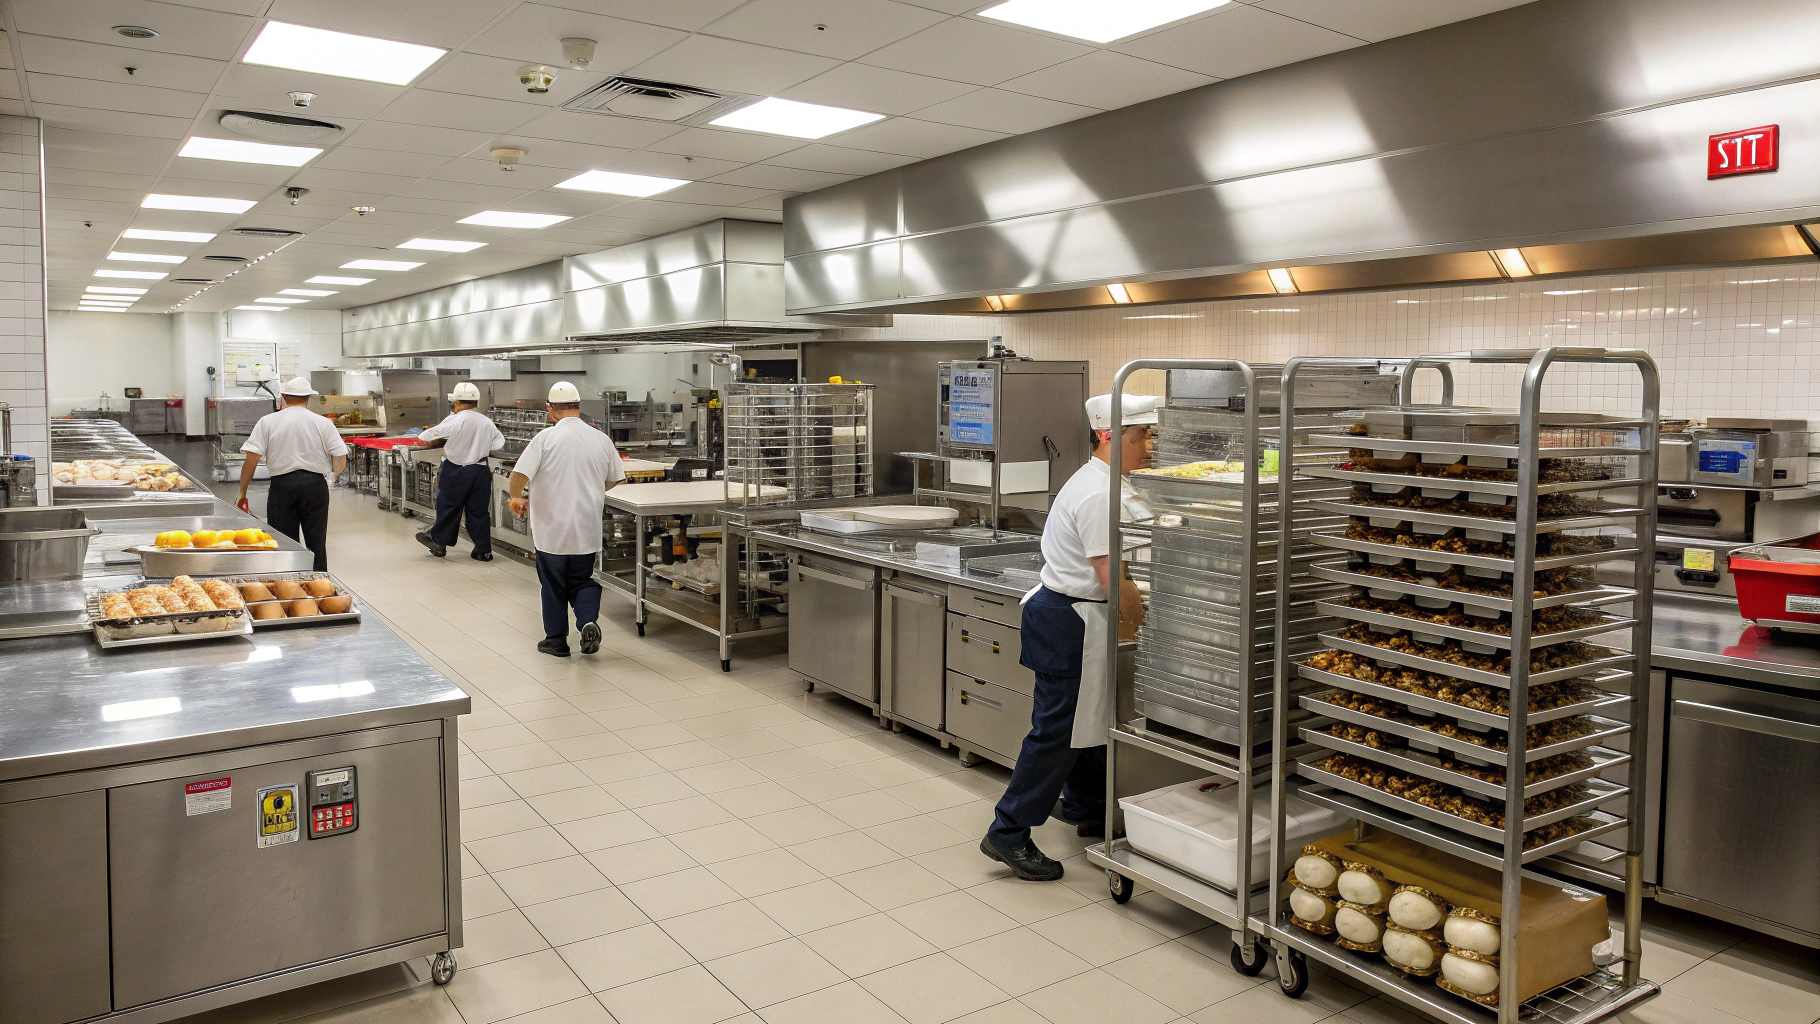
The culmination of the menu-backed planning process is the Bill of Materials (BOM). This comprehensive document lists every single piece of equipment and smallware required for the kitchen. It serves as the master procurement list, the foundation for budget development, and a critical reference for architects and engineers.
A downloadable spreadsheet template is recommended for this purpose. The template should be organized by kitchen station or zone and include essential columns such as:
-
Station/Zone
-
Item #
-
Equipment Name
-
Manufacturer & Model #
-
Key Specifications (Throughput, Dimensions, Capacity)
-
Utility Requirements (Gas, Electrical, Water)
-
Quantity (Qty)
-
Unit Cost & Total Cost
-
Certifications (NSF, ETL, CE, etc.)
This structured BOM transforms the equipment list from a simple shopping list into a detailed specification document that minimizes ambiguity. For assistance in building your BOM and sourcing high-quality, factory-direct equipment and furniture, contact the RON Group Global team.
Section 5.2: Concept-Specific Equipment Checklists (Appendices)
To accelerate the planning process, this guide includes several appendices with pre-populated equipment checklists for common restaurant concepts. These can serve as a robust starting point for operators.
Pizzeria Equipment Checklist
This checklist is tailored for an operation focused on producing pizzas, from dough preparation to baking and service.
-
Dough Preparation: Commercial Dough Mixer (Floor Model, 60-80 qt), Dough Divider, Dough Rounder, Dough Sheeter/Press.
-
Dough Storage & Proofing: Dough Boxes, Dough Box Racks, Proofing Cabinet.
-
Refrigeration: Walk-In Cooler, Pizza Prep Table, Undercounter Refrigeration.
-
Cooking: Pizza Deck Oven (Gas or Electric), Conveyor Oven (for high volume), Convection Oven.
-
Smallwares & Tools: Pizza Peels, Pizza Screens/Disks, Pizza Cutters, Dough Scrapers, Ladles, Cheese Shredder, Pizza Scale.
-
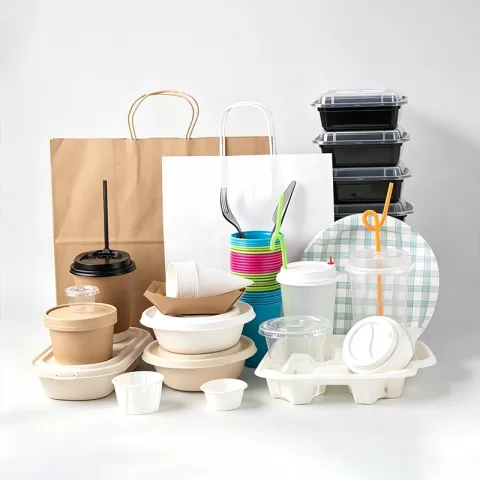
Takeout & Delivery: Pizza Boxes, Insulated Pizza Delivery Bags, Portion Cups.
Bakery Equipment Checklist
This checklist covers the essential equipment for a retail or production bakery.
-
Mixing & Preparation: Planetary Mixer (Floor Model, 40-80 qt), Countertop Mixer, Dough Sheeter, Stainless Steel Work Tables.
-
Proofing & Holding: Proofing Cabinet (with humidity control), Holding Cabinet.
-
Baking: Rack Oven (for high volume), Convection Oven (double-stack is common), Deck Oven (for artisan breads).
-
Refrigeration: Walk-In Cooler, Reach-In Refrigerator/Freezer, Undercounter Refrigeration.
-
Finishing & Display: Icing/Finishing Table, Cooling Racks (mobile), Display Cases (refrigerated and dry).
-
Smallwares & Tools: Baking Sheets, Bread Pans, Cake Pans, Muffin Tins, Pastry Bags and Tips, Spatulas, Whisks, Rolling Pins, Digital Scales.
Sushi Restaurant Equipment Checklist
This checklist is designed for a restaurant specializing in sushi and sashimi, emphasizing specialized equipment.
-
Sushi Station (Front-of-House): Refrigerated Sushi Display Case, Professional Sushi Knives, Hinoki Cutting Boards, Under-counter Refrigeration.
-
Rice Preparation: High-Capacity Commercial Rice Cooker, Rice Warmer, Rice Washing Bowls, Sushi Rice Mixer (Hangiri).
-
Kitchen Cooking & Prep: Tempura Fryer, Commercial Range, Steamer, Noodle Cooker.
-
Refrigeration: Walk-In Cooler, Sashimi-Grade Freezer (ultra-low temperature), Reach-In Refrigerator/Freezer.
-
Smallwares & Tools: Bamboo Rolling Mats (Makisu), Rice Paddles (Shamoji), Fish Bone Tweezers, Fish Scalers, Graters, Traditional Japanese tableware.
-
Warewashing & Safety: Three-Compartment Sink, Hand Washing Stations, Commercial Dishwasher.
Many of these concepts will also require a significant investment in front-of-house items. For durable, custom, and cost-effective solutions, browse our collection of wholesale restaurant furniture.
Get the week's latest industry information
-
Real-Life Professional Restaurant Case Studies
Explore Now
-
Create a unique restaurant with over 95,700+products
Explore Now
-
Protessional Free 3D Restaurant Design
Explore Now
-
Still Have Questions About Opening a Restaurant?
Explore Now

Sylvia
With 8 years in catering & hospitality industry, sales manager of Ron Group, specialise in providing one stop solutions to restaurants, hotels and weddings.
Discover Our Exclusive Products
Explore our extensive range of restaurant and hotel supplies designed to enhance your operations. Find the perfect solutions to meet your needs.
Browse Our ProductsFREE 3D DESIGN
Boost your restaurant's success with our free 3D design service. Start building the restaurant of your dreams today!
Explore 3D Design Case
RECOMMENDED CASES
-
La Rambla by Catalunya: Crafting Barcelona's Soul in Hong Kong - Custom Furniture Excellence
RON Group's custom Spanish-inspired furniture elevates La Rambla with artisanal aesthetics...
Learn More -

Cardinal Point: Elevating Outdoor Seating with Tailored Cushion Upgrades
Discover how Cardinal Point transformed its outdoor dining experience with custom cushions, achievin
Learn More
RECOMMENDED BLOGS
-

Bar Glassware 101: Types, Names, Uses, and How to Stock Your Bar
Learn the 10 core bar glassware types, names, and uses. Discover how to stock your bar with the right glasses for cocktails, beer,...
Sylvia2026-07-26 -
Complete Bar Equipment List for Opening a Bar
Use a complete bar equipment list with pictures, covering workstations, ice, refrigeration, glassware, utilities, sanitation and a...
Sylvia2026-06-11 -

Low-Budget Restaurant Interior Design Ideas: Spend Where Guests and Staff Notice
Explore low-budget restaurant interior design ideas, practical material choices, layout priorities and phased upgrades without...
Sylvia2026-04-04
Subscribe to RON GROUP
Stay up-to-date with the latest industry insights and expert advice. Together, we'll create your ideal restaurant.